Anonymous Receive Connector in Exchange

Anonymous Receive Connector in Exchange

Creating a Receive Connector for Scanners/Firewall

Using the Exchange Admin Center

  1. Log in to Exchange Admin Center
  2. Click on Mail Flow -> Receive Connectors and click on the plus sign
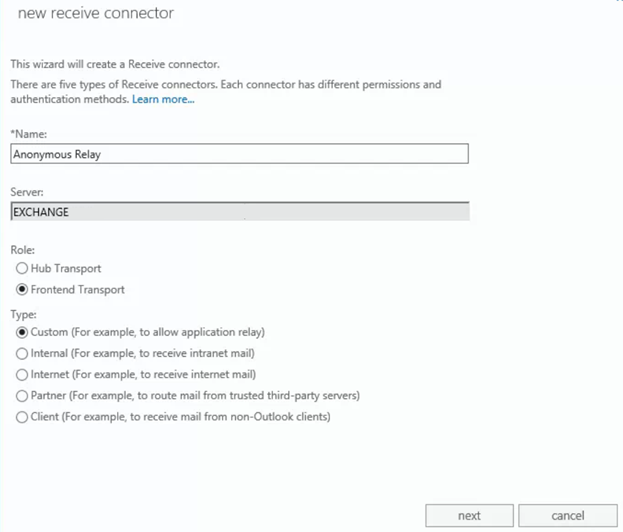
  3. Enter a name, Choose the Frontend Transport Role and leave the type as Custom
  1. Leave the Network Adapter Bindings as default
  2. Change the Remote Network Settings to only the IP address of the device that needs to send email and click on Finish.
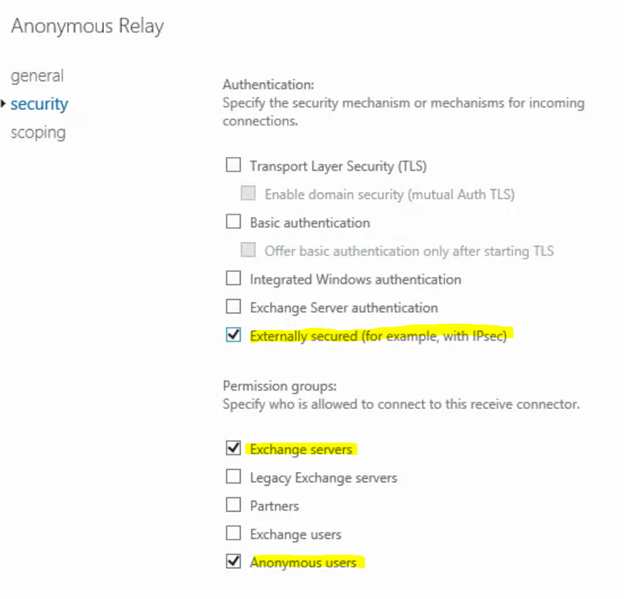
  3. Edit the connector you just created and click on the security tab and make sure that Externally Secured is set for Authentication and the permission groups are Exchange Servers and Anonymous Users are checked in the permission groups.

Using the Exchange Management Shell

  1. Log in to the Exchange Server
  2. Open the Exchange Management Shell
  3. Paste in the following lines of code
#Change the following Values per environment
$ReceiveConnector = "Anonymous Relay"
$RemoteIPRanges = "192.168.27.10","192.168.27.11"

#New Exchange Receive Connector is created
New-ReceiveConnector -Name $ReceiveConnector -TransportRole FrontendTransport -Custom -Bindings 0.0.0.0:25 -RemoteIpRanges $RemoteIPRanges
Set-ReceiveConnector $ReceiveConnector -PermissionGroups AnonymousUsers
Get-ReceiveConnector $ReceiveConnector | Add-ADPermission -User "NT AUTHORITY\ANONYMOUS LOGON" -ExtendedRights "Ms-Exch-SMTP-Accept-Any-Recipient"
Set-ReceiveConnector $ReceiveConnector -AuthMechanism ExternalAuthoritative -PermissionGroups ExchangeServers,AnonymousUsers
Get-ReceiveConnector $ReceiveConnector | Format-List Enabled,TransportRole,Bindings,RemoteIPRanges 

Leave a Reply

Your email address will not be published. Required fields are marked *