
- Open the Group Policy Management Console
- Create a new Policy called Restricted Groups – Local Administrators
- Right-click the policy and click edit
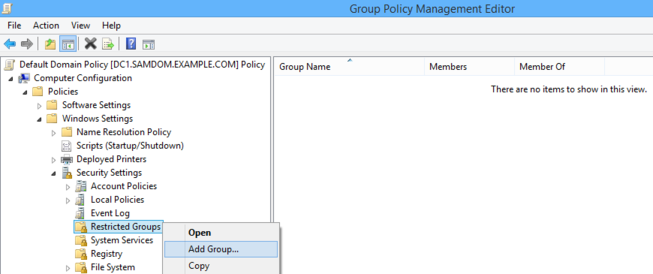
- Navigate to Computer Configuration / Policies / Windows Settings / Security Settings / Restricted Groups and choose Add group
- Enter the local Administrators group name. If you use the Browse button, select the local computer, by using the Locations… button in the window, to browse local instead of AD security objects
- Click the Add button next to the Members of this group box.
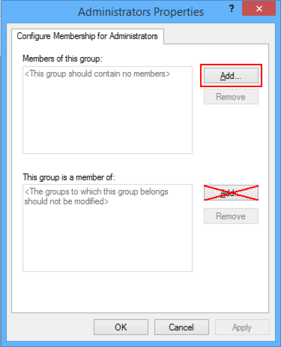
- Enter the domain group DOMAINNAME\Local Admins and the local Administrator account. If you use the Browse button, select the domain/local computer, by using the Locations… button, to browse the domain/local security objects

- You see the local Administrator account and the AD group DOMAIN NAME\Local Admin in the Members of this group list.
- Click OK
- Assign the policy to a test OU with only 1 computer in it to test the policy to ensure that it is working as intended
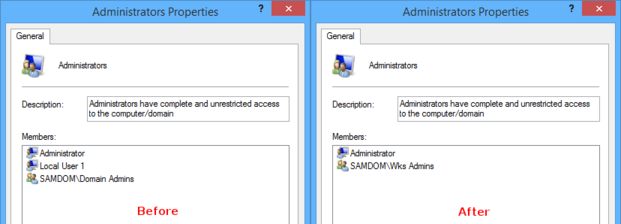
- After the clients have re-read the changed group policy, only the local Administrator account and then domain group DOMAINNAME\Local Admins will appear in the local Administrators group on each client affected by the GPO. All previous members have been replaced by this new members.